Choosing a roll up banner size means checking more than the width on a quote. The visible message, total printed sheet and assembled stand can have different dimensions. This guide helps Toronto and GTA businesses choose a suitable display, prepare artwork and avoid putting essential information inside the base.
Good retractable banner artwork setup starts with a confirmed hardware template.
What a roll-up banner includes
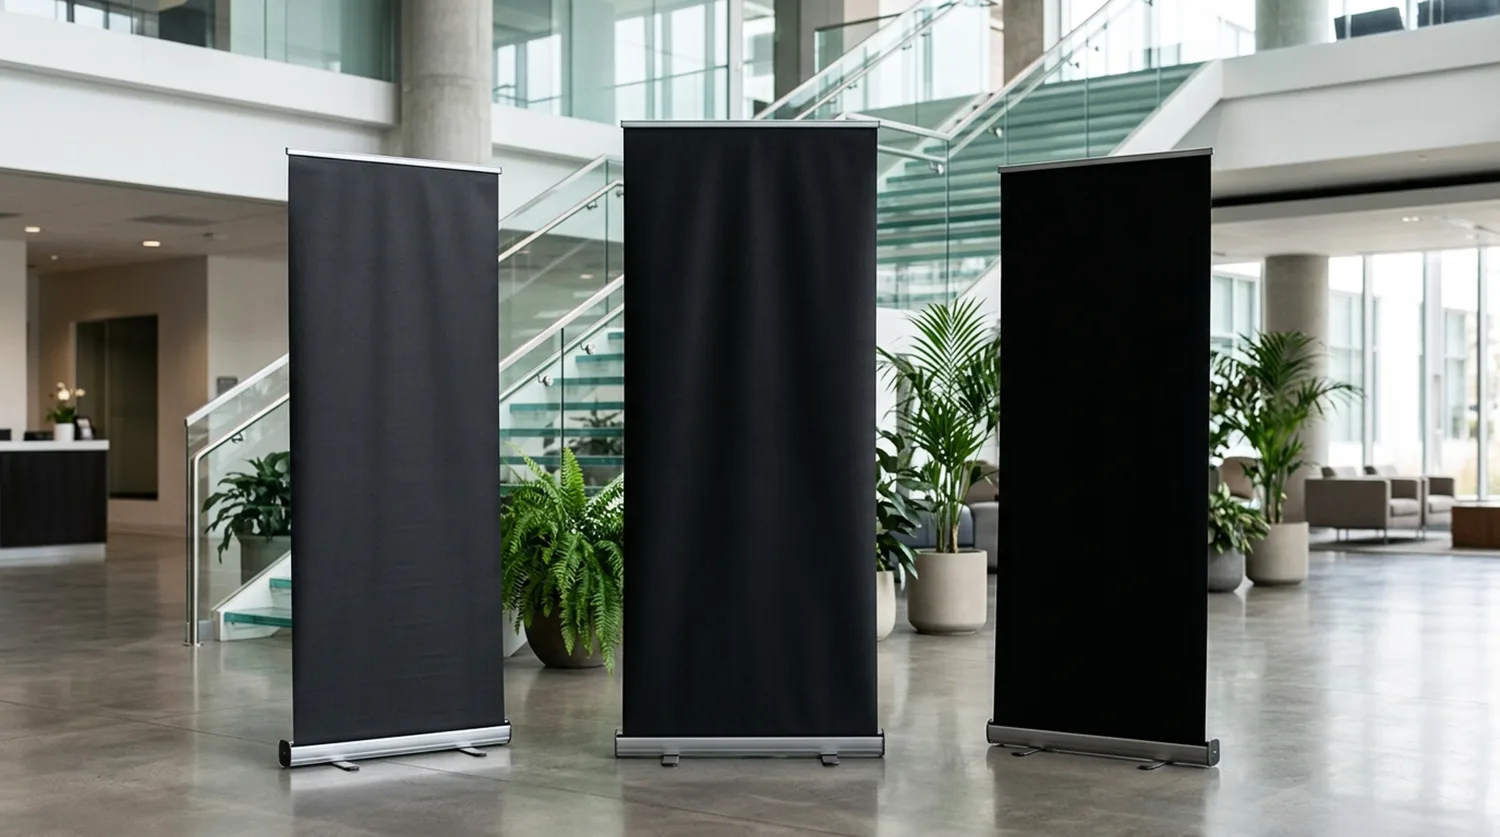
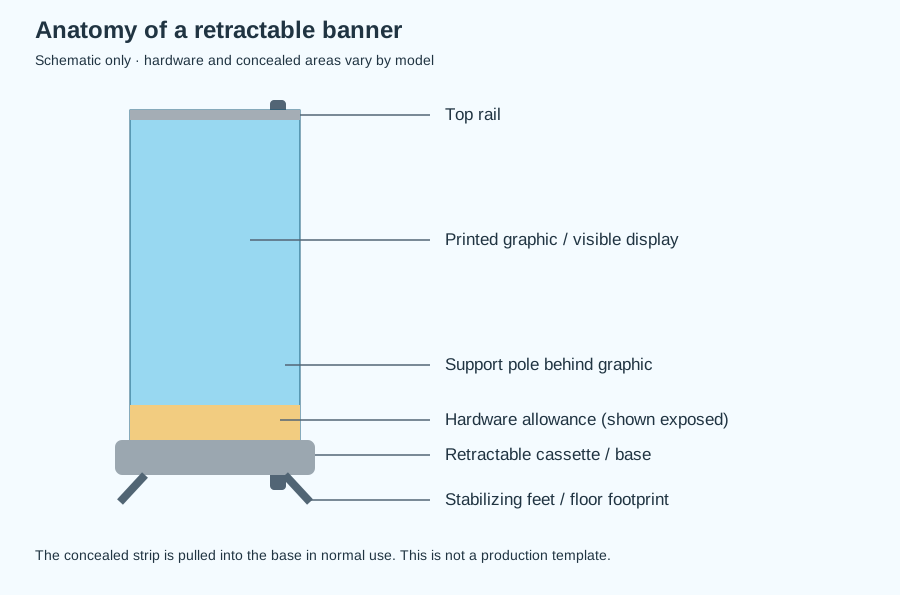
A roll-up banner is a portable retractable display: the printed graphic pulls out of a spring-loaded cassette and attaches to a support pole and top rail. A carrying case protects the packed display between indoor events.
It differs from a hanging vinyl banner, which needs mounting points, and an X-frame banner, whose corner fixings hold the graphic on an exposed frame. Start with our banner product category to compare formats. Our roll-up versus X-frame guide covers that purchasing choice in more detail.
Roll up banner size: compare the right measurements
There is no single universal banner size or cassette allowance. A size advertised as “33 × 81 inches” does not establish the printable file dimensions for every stand.
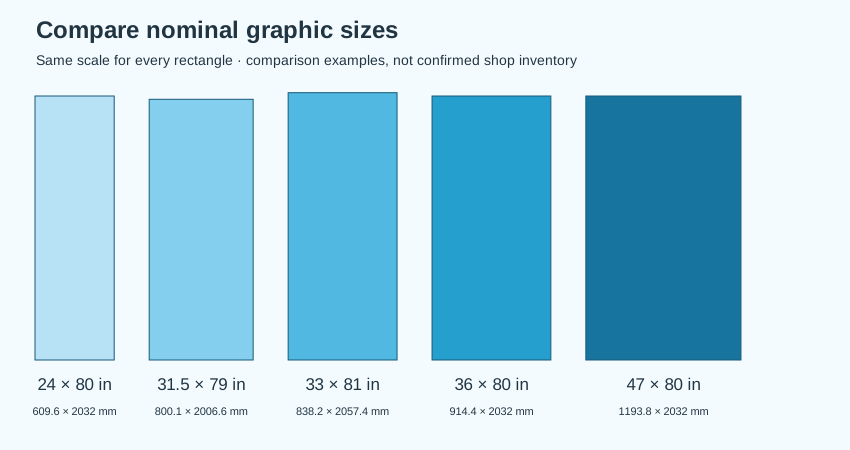
| Nominal width × height | Exact conversion to mm | Possible application |
|---|---|---|
| 24 × 80 in | 609.6 × 2,032 mm | Narrow promotional position |
| 31.5 × 79 in | 800.1 × 2,006.6 mm | Reception or conference display |
| 33 × 81 in | 838.2 × 2,057.4 mm | Event message or service overview |
| 36 × 80 in | 914.4 × 2,032 mm | Product demonstration |
| 47 × 80 in | 1,193.8 × 2,032 mm | Wider visual presentation |
These are comparison examples, not a list of Branding Centres stock. Dimensions use exactly 25.4 millimetres per inch; similarly named metric hardware may use rounded nominal measurements.
At the time of checking, our catalogue lists 33.5 × 60-inch (850.9 × 1,524 mm) and 33.5 × 83.25-inch (850.9 × 2,114.55 mm) roll-up graphics. A separate hardware listing specifies a 33.5-inch single-sided stand. Our campaign page also advertises other formats; confirm the selected model, availability and matching template when requesting your quote.
Distinguish five measurements before designing:
- Visible graphic: the exposed image after assembly.
- Print dimensions: the entire sheet, including material concealed by hardware.
- Cassette allowance: the part retained in the base, defined by that model.
- Footprint: the base and extended feet, including depth into a walkway.
- Assembled height: the complete stand, including its base and rail.
Explore a nominal graphic size
24 × 80 inches
609.6 × 2,032 mm
31.5 × 79 inches
800.1 × 2,006.6 mm
33 × 81 inches
838.2 × 2,057.4 mm
36 × 80 inches
914.4 × 2,032 mm
47 × 80 inches
1,193.8 × 2,032 mm
Fit the space and the message
Measure the floor area before choosing a wider banner. Retail stores and restaurants need clear customer routes; reception areas and real estate presentations need enough space for visitors to stop and read. For trade shows and conferences, check booth rules and sightlines around counters.
Product demonstrations benefit from one clear image and a short explanation. Community events and service businesses often need a headline, contact method and simple next step.
Retractable banner artwork setup starts with the template
Use the template for the actual stand and material, rather than copying a flyer’s bleed settings. Ask for written confirmation of total print size, visible area, concealed sections, safe zones and any bleed before laying out the file.
Our catalogue currently describes no bleed and a ¼-inch text inset for its roll-up graphic. However, the downloadable template data has no cassette markings and records zero safe margins. Those files alone do not establish what the stand will conceal. Have the shop confirm the production template for your order; do not add an assumed bottom strip or treat the whole sheet as visible.
A verified manufacturer example
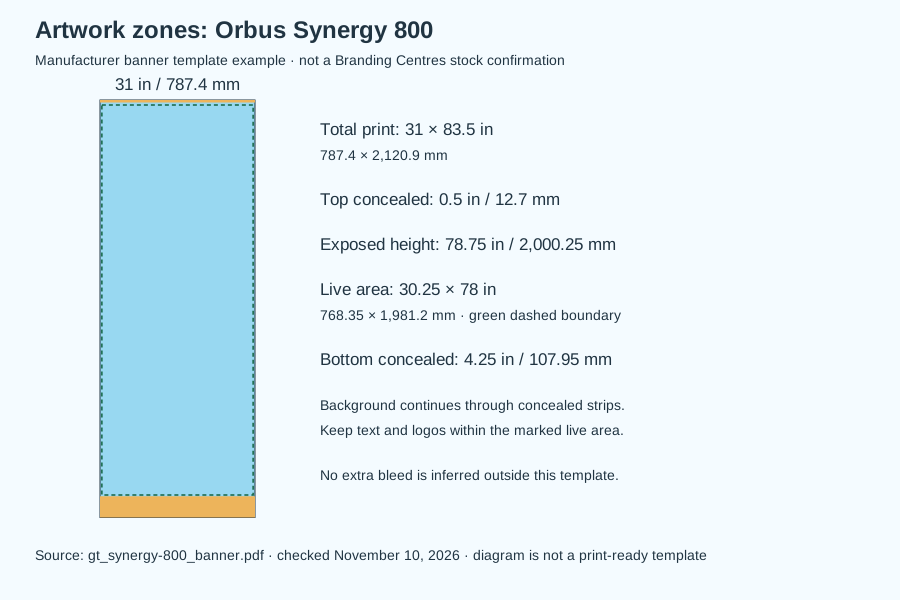
The Orbus Synergy 800 banner template, checked in November 2026, provides a useful illustration of why hardware matters. It specifies a 31 × 83.5-inch total graphic (787.4 × 2,120.9 mm), with ½ inch concealed at the top and 4¼ inches concealed at the bottom. Subtracting those areas leaves 78.75 inches (2,000.25 mm) of exposed height.
Its marked live area is 30.25 × 78 inches (768.35 × 1,981.2 mm). The template asks for background artwork through the concealed areas, with no text there. This is a manufacturer example, not confirmation that Branding Centres stocks this stand. See the original hardware template.
File preparation checklist
- Build at the approved full-size dimensions, or declare the scale clearly.
- Extend backgrounds through the required print area and any specified bleed.
- Keep logos, headlines, contact details and QR codes inside the template’s live area.
- Supply vector logos where possible; check photographs at their final placed size.
- Use the printer’s requested CMYK setup and discuss colour-critical matches before printing.
- Embed fonts or outline a delivery copy, retaining an editable original.
- Export a PDF with the required page size and image quality. Add crop marks only if requested; remove template guides from the production artwork.
- Check spelling, phone numbers, QR destinations and layout on the proof before approval.
Our design guide provides general file advice. For retractable banner artwork setup, the approved hardware template takes priority over generic settings.
Resolution at actual print size
Judge raster images by their effective pixels per inch at the size they will print. For example, a 4,950-pixel-wide image placed across 33 inches gives 150 PPI; stretching it across 47 inches reduces that to about 105 PPI. A 2,400-pixel image across 24 inches gives 100 PPI.
These are calculations, not acceptance limits. Vector shapes remain scalable, although placed photographs and raster effects still have resolution limits.
Changing a resolution field or enlarging a small image does not recover missing detail. Ask the printer to assess the actual file. The campaign page mentions 150 DPI at final size, while the catalogue requests 300; confirm which requirement applies before export rather than assuming every large-format graphic needs 300 PPI.
Choose material, hardware and a realistic budget
Choose a graphic material approved for the cassette’s thickness and attachment method. Our catalogue offers vinyl and premium fabric; the quote should identify the exact material and finish.
Ask about curl resistance, opacity and light transmission, particularly near bright windows. Matte surfaces generally reduce reflections; gloss changes the appearance under lighting. A double-sided display needs hardware designed for two graphics, rather than printing the reverse of a single-sided unit.
Standard and premium mechanisms can differ in base construction, pole adjustment, transport protection and graphic replacement method. Some systems accept replacement cassettes or graphics; others require specialist fitting or are unsuitable for economical replacement. Indoor hardware should not be assumed suitable for wind or rain.
What affects the quote
Dimensions, material, hardware, quantity, sides, artwork work, rush production and delivery all affect cost. A replacement graphic, hardware-only order and complete package are different purchases. Compare like-for-like totals in Canadian dollars, including applicable tax.
An exact quote needs your preferred size, stand model if reusing hardware, quantity, artwork, material preference, event deadline and delivery address. For existing stands, send photographs of the base, rail and model label. Do not order by width alone.
Ordering example and your roll up banner size checklist
A hypothetical Toronto service business needs one indoor banner for an upcoming presentation. If the supplier confirms the Synergy 800 model used above, its designer builds the 31 × 83.5-inch file, retaining the template’s 78.75-inch exposed height and 30.25 × 78-inch live area.
The logo and headline sit high within that live area, a product image occupies the middle, and contact details remain comfortably above the cassette boundary. Background colour continues into the ½-inch top and 4¼-inch bottom concealed strips. The designer supplies a PDF without guide lines and checks the proof for dimensions, text and image quality.
The buyer confirms one approver, the in-hand deadline and pickup arrangements. This example illustrates the process; your order must use its own approved stand template.
Ready to Print Your Roll-Up Banner?
Branding Centres provides retractable banner printing for Toronto and GTA businesses, with no minimum advertised on the campaign page. Ask about qualifying same-day or next-day production, pickup in Etobicoke and Uber delivery. Availability depends on hardware, quantity, capacity and approved artwork; the catalogue’s standard graphic listing currently shows 5–7 business days.
Review our roll-up banner service, then request an exact quote. Confirm your roll up banner size and production template before approving print. Visit 24 Ronson Drive, Unit 1, Etobicoke, ON M9W 1B4, or call +1 (416) 288-8661.
Frequently asked questions
What is the standard roll-up banner size?
There is no universal standard that fits every cassette. Widths around 31.5–33.5 inches appear in common formats, but heights and hidden areas vary. Branding Centres’ checked catalogue lists 33.5-inch graphics in two heights. Confirm the model and template rather than treating a familiar size name as the complete artwork specification.
What size should my retractable banner design be?
Your design should match the total print dimensions in the approved hardware template. That may be taller than the visible display because some material remains inside the cassette or top rail. Confirm any bleed separately, and keep text within the marked live area.
How much space should I leave at the bottom?
Use the bottom allowance stated for your exact stand. The manufacturer example in this guide conceals 4¼ inches, but that figure must not be transferred to another model. Ask the printer to mark the visible boundary and live area on your proof, keeping essential information above both the mechanism and its safe zone.
What resolution should banner artwork be?
The required effective resolution depends on the image’s printed size, viewing distance and production process. Calculate pixels divided by printed inches, then have the printer assess the file against the order’s requirements. Vector logos avoid pixelation, but enlarging a low-resolution photograph cannot restore the detail absent from its original capture.
Can I replace the graphic in an existing stand?
Sometimes, provided the mechanism permits replacement and suitable material and attachment parts are available. Send the model number and photographs before ordering. Two stands with similar widths can require different sheet lengths or fittings. Have the shop confirm compatibility and fitting cost before deciding that a replacement graphic is the economical option.
Can a roll-up banner be printed the same day?
Same-day service is advertised for qualifying orders, subject to confirmation. Stock availability, the chosen hardware, quantity, artwork corrections and proof approval affect the schedule. Give the shop your actual in-hand deadline and pickup or delivery details. Obtain a confirmed completion time before making event plans around a rush order.
Toronto prices: Flyer Printing Toronto from $99.76 per 250 · Roll Up Banners Toronto from $140.40 per graphic